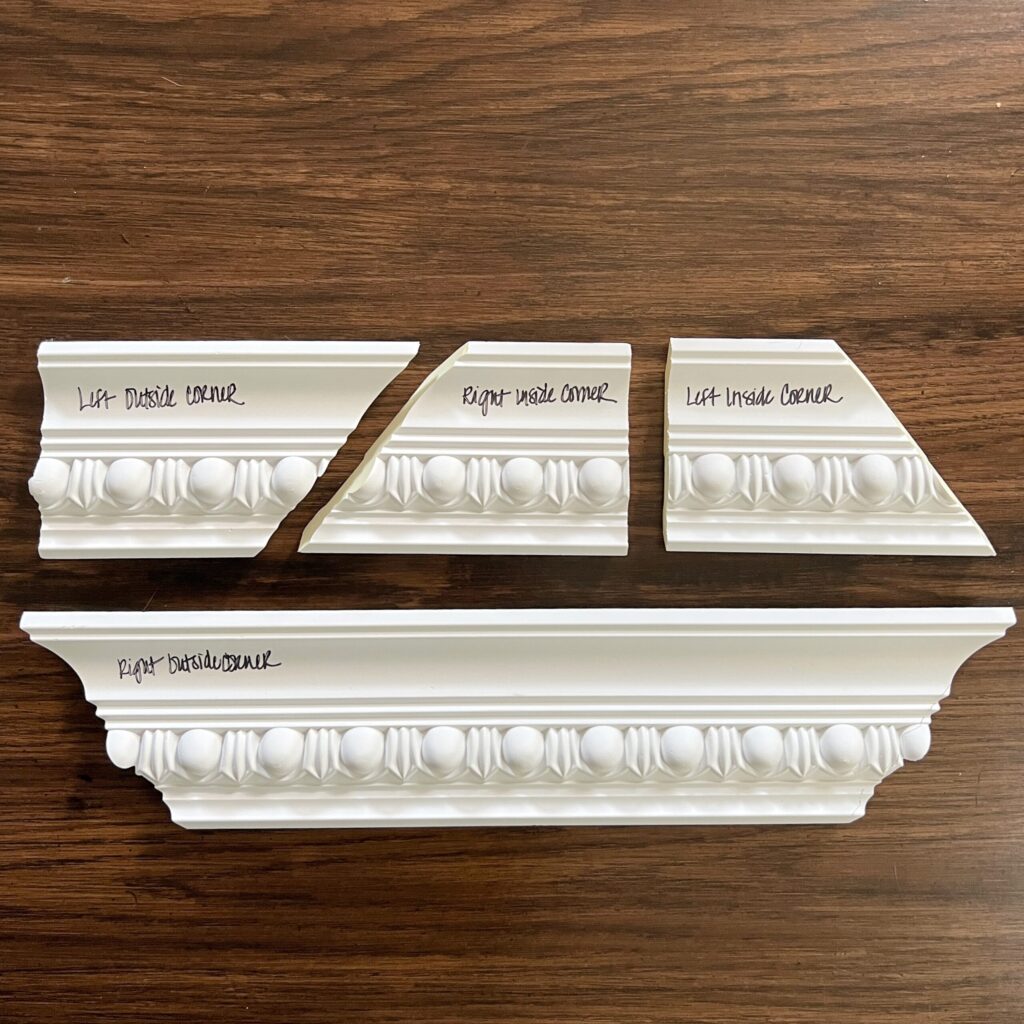
How to Make Crown Molding Cuts A Beginners Guide
Crown molding is a fantastic way to elevate the look of any room by adding a touch of elegance and style. However, when it comes to installing crown molding, the cutting process can be intimidating, especially for beginners. The angles involved and the need for precise measurements can make it seem like a daunting task. But with the right tools, techniques, and a little practice, making crown molding cuts can be an easy and rewarding DIY project.
In this beginner’s guide, we’ll walk you through everything you need to know about making crown molding cuts, from the essential tools to step-by-step instructions for getting professional-looking results.
Essential Tools for Cutting Crown Molding
Before you begin cutting your crown molding, it’s important to gather the right tools for the job. Here’s a list of the most commonly used tools for crown molding cuts:
- Miter Saw: The best tool for making precise angle cuts. A compound miter saw or sliding compound miter saw is ideal because it can handle both miter cuts (angled cuts across the width of the molding) and bevel cuts (angled cuts along the thickness of the molding).
- Crown Molding Jig (Optional): A specialized jig helps hold the molding at the correct angle while cutting. This is particularly helpful for beginners, as it makes it easier to maintain consistent, precise cuts.
- Tape Measure: To ensure accurate measurements for your cuts.
- Pencil: To mark your cutting lines.
- Clamps: To secure the molding in place while cutting.
- Level: To ensure your molding is aligned correctly when installing.
Understanding the Angles
One of the most challenging parts of cutting crown molding is understanding the angles. Crown molding typically requires two angles for each cut:
- Miter Cut: This is the angle that cuts across the width of the molding, usually at either 45° or 30° depending on your project.
- Bevel Cut: This cut refers to the angle along the thickness of the molding, which helps it fit flush against the wall and ceiling.
Common Angle Sizes
- Standard Angles: Most crown molding will require 45° miter cuts. If you’re working with an interior corner, the standard angle is typically 90° between the two walls. However, this angle may vary depending on the room’s shape.
- Crown Angle: The crown molding itself typically sits at a specific angle (often around 38° to 45°). This is the angle you’ll need to match when cutting bevels.
To get precise results, it’s important to understand how the molding fits into the corner. Keep in mind that inside corners and outside corners require different cutting techniques.
Step-by-Step Guide for Making Crown Molding Cuts
Step 1: Measure the Length of the Molding
Start by measuring the wall where the molding will be installed. Use your tape measure to measure the exact length needed for each piece of molding. It’s essential to double-check these measurements, as accurate cuts rely on correct measurements.
- Tip: For corners, ensure you account for the angle, and don’t forget to measure both sides of the corner.
Step 2: Set Up Your Saw
Set up your miter saw on a stable surface, ensuring it is secured and level. If you’re using a crown molding jig, position the molding at the correct angle according to the molding’s profile. The jig will keep the molding in place at the proper angle while you make the cuts.
- Tip: If you don’t have a jig, you can still make cuts by adjusting the angle of the saw to the correct bevel and miter.
Step 3: Cut Your First Piece of Molding
For your first cut, place the molding upside down and against the saw’s fence. For interior corners, set the saw to cut at a 45° miter angle. Make the cut in one smooth motion, keeping the saw steady.
- Tip: For outside corners, you’ll need to reverse the miter angle (usually cutting at 45° in the opposite direction).
Step 4: Measure and Cut Additional Pieces
Once the first cut is done, measure the next length of molding and repeat the process. When cutting for interior corners, use the same technique, but remember that the two pieces must fit together neatly when installed.
- Tip: For outside corners, make sure the cuts are angled in the opposite direction so that they will meet properly at the corner.
Step 5: Test Fit and Adjust if Necessary
Once you’ve made your cuts, it’s important to test fit the pieces of molding on the wall before installing them permanently. Place the cut molding pieces in their respective positions and check if they fit snugly at the corners. If the pieces don’t fit properly, you may need to make small adjustments with your saw.
- Tip: A coping saw can be helpful if you need to make additional small adjustments to the cuts.
Step 6: Install the Molding
Once your cuts are perfect, you can proceed to install the crown molding. Use nails or a nail gun to secure the molding to the wall and ceiling. Be sure to use a level to keep the molding straight and aligned.
Final Thoughts
Cutting crown molding can be a bit tricky for beginners, but with the right tools and some practice, it becomes easier over time. By understanding the angles involved, measuring accurately, and using the correct saw settings, you can achieve professional-looking results. Always test fit your pieces before securing them, and don’t be afraid to make small adjustments as needed.
By following this guide, you’ll be able to cut and install crown molding with confidence, creating a beautiful, finished look for your home. Whether you’re tackling a small project or an entire room, these crown molding cuts will add a polished, elegant touch that will elevate your space.